The objects I catalogue are specifically used in educational labs for school-aged children, so the catalogues I make will be different than other departments’ catalogues because my audience are children and the object’s purpose is to educate them. I’m going to go through the process of cataloguing a new object as well as all the necessities needed for storing it safely and informatively for years to come.
Acquiring the Objects
Some objects at the Royal Ontario Museum have romantic, inspiring backstories, such as the snakeskin used in the Hands-On Biodiversity area. This illegally poached snake somehow managed to get donated to the museum and evaded being turned into an ugly handbag. Although the museum does receive many kind donations and loans, a lot of the objects are bought online from places such as:
- eBay
- Amazon
- Online auctions from historical houses
- Personal collectors selling their collection
Some of the historical Canadian objects have come from the St. Lawrence Market and were donated from the personal collection of my supervisor, who has his own personal collection of items.
Making the Record
After the Learning Department acquires an object, a catalogue entry is created online which is transferred to a binder once it had been completed. The record sheet has pertinent information such as:
- A physical description of the object
- Pictures (usually front and back)
- Where it comes from (country, person who donated it, etc.)
- It's condition upon entry
- Where it is located in storage
Researching the Object
Some objects can be confusing or unclear without relevant background and contextual information and require a brief information sheet to go along with their record. One object I’ve had to research is the huipil, an important piece of women’s clothing from the Maya culture in Mexico and parts of South America. Without understanding the importance of clothing, weaving, colours, or patterns in Maya culture, the huipil wouldn’t be an apparent example of cross-cultural impact or the durability of the Maya culture.
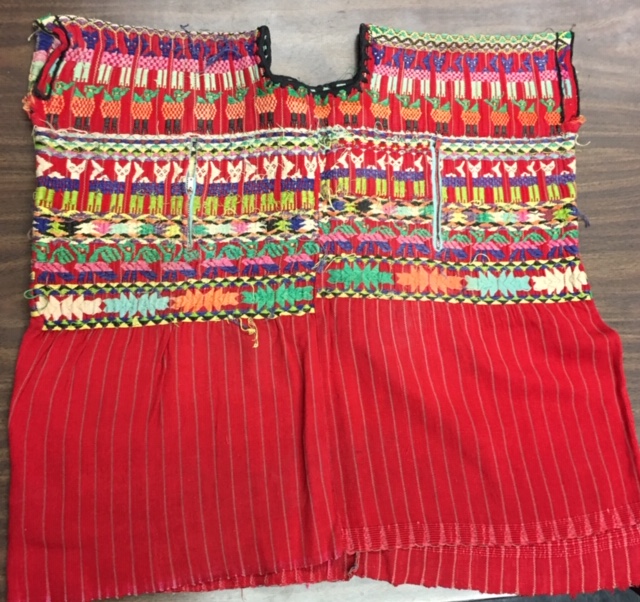 A picture I took of a huipil. Property of the ROM Learning Dept.
Mapping the Curriculum
The labs where these items are used are grouped under one theme and use subgroups in order to break the class into smaller groups and make discussions easier and more focused. For example, the “Genocide and Crimes Against Humanity” theme I worked on has several subgroups, one being “Concentration Camps”. Organizing subgroups are important not only for organizing the catalogue and storage space but also for educators, giving them the freedom to choose what they want to focus on in their lesson plans.
Creating a Storage Space
You might think the museum has people who create storage spaces for objects but in the Learning Department, we do everything. Once a suitable number of trays are available in storage, you have to plan and prepare each object.
1. Cut thick foam to fit inside the shelf’s tray
2. Plan and trace each object on the foam
3. Cut the traced object, half the cut foam, and put the halved piece back where you cut it from
4. Label each object in their foam spot and on the front of the tray
5. Number the shelves and label them
6. Take a picture of the finished tray for reference and place it on the door of the storage cabinet
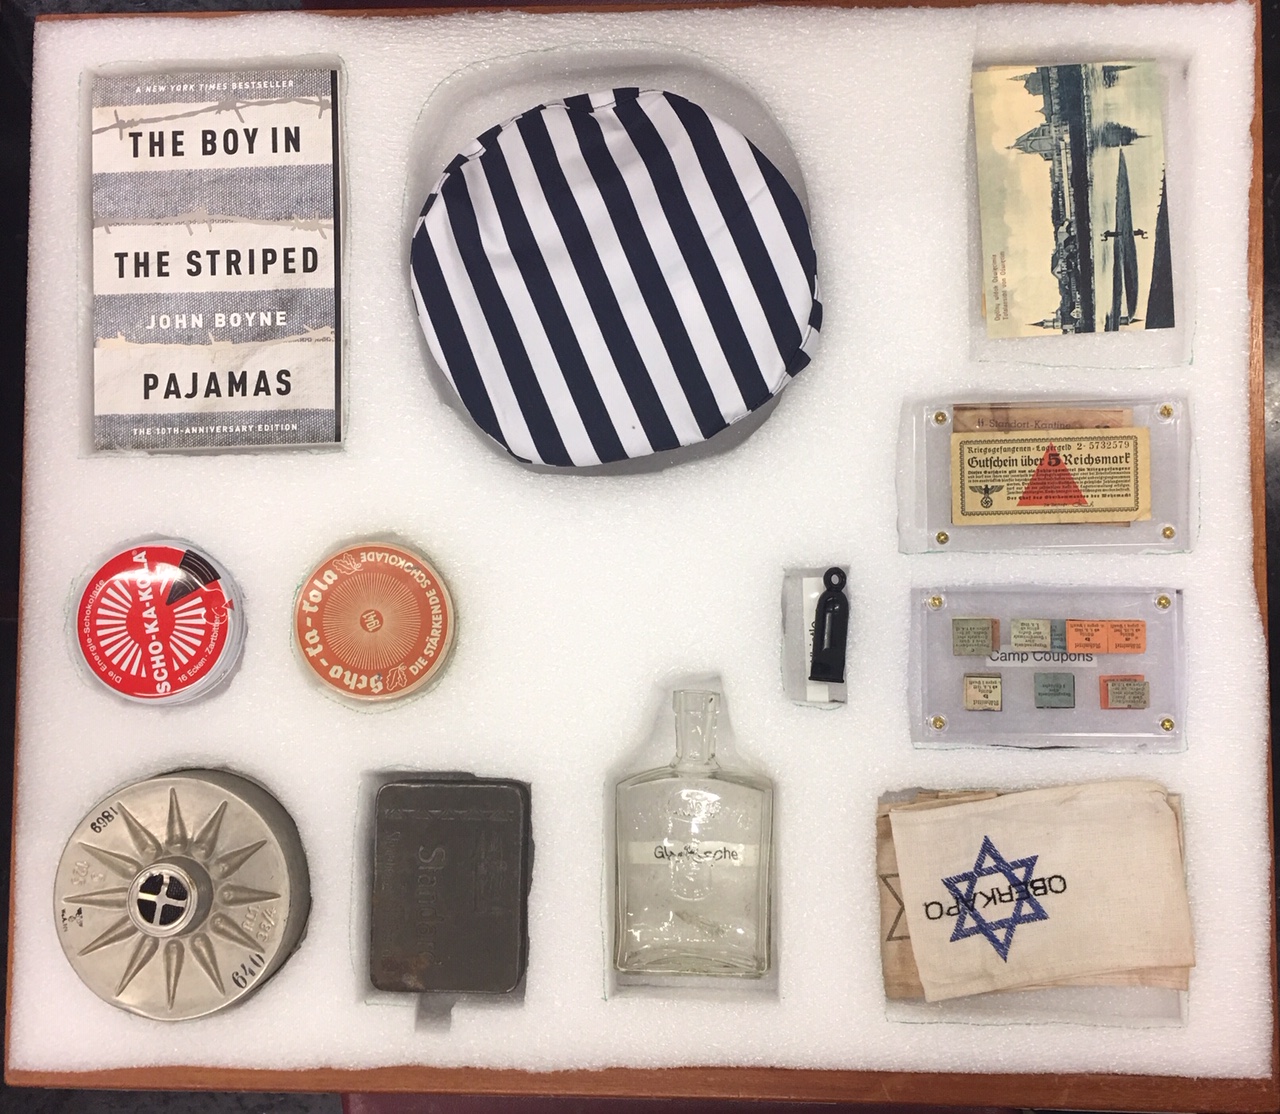 A tray I finished. Property of the ROM Learning Dept.
Once the storage process is complete, the catalogues can be updated, printed, and stored. While the completion of this process signifies that an object can be used, there needs to be people who can confidently teach these objects. To finally teach this curriculum, educators attend workshops, meetings, and other events, coupled with doing supplementary readings to prepare them to finally introduce these new objects in the museum.