Images used on your website must either be your own or comply with copyright laws. Always ensure that your images:
- Respect intellectual property rights
- Do not violate University of Toronto policies
- Have been uploaded to the server before being added to a page
Free Resource: You can find royalty-free icons and images on The Noun Project. Be sure to follow licensing terms and provide attribution if required.
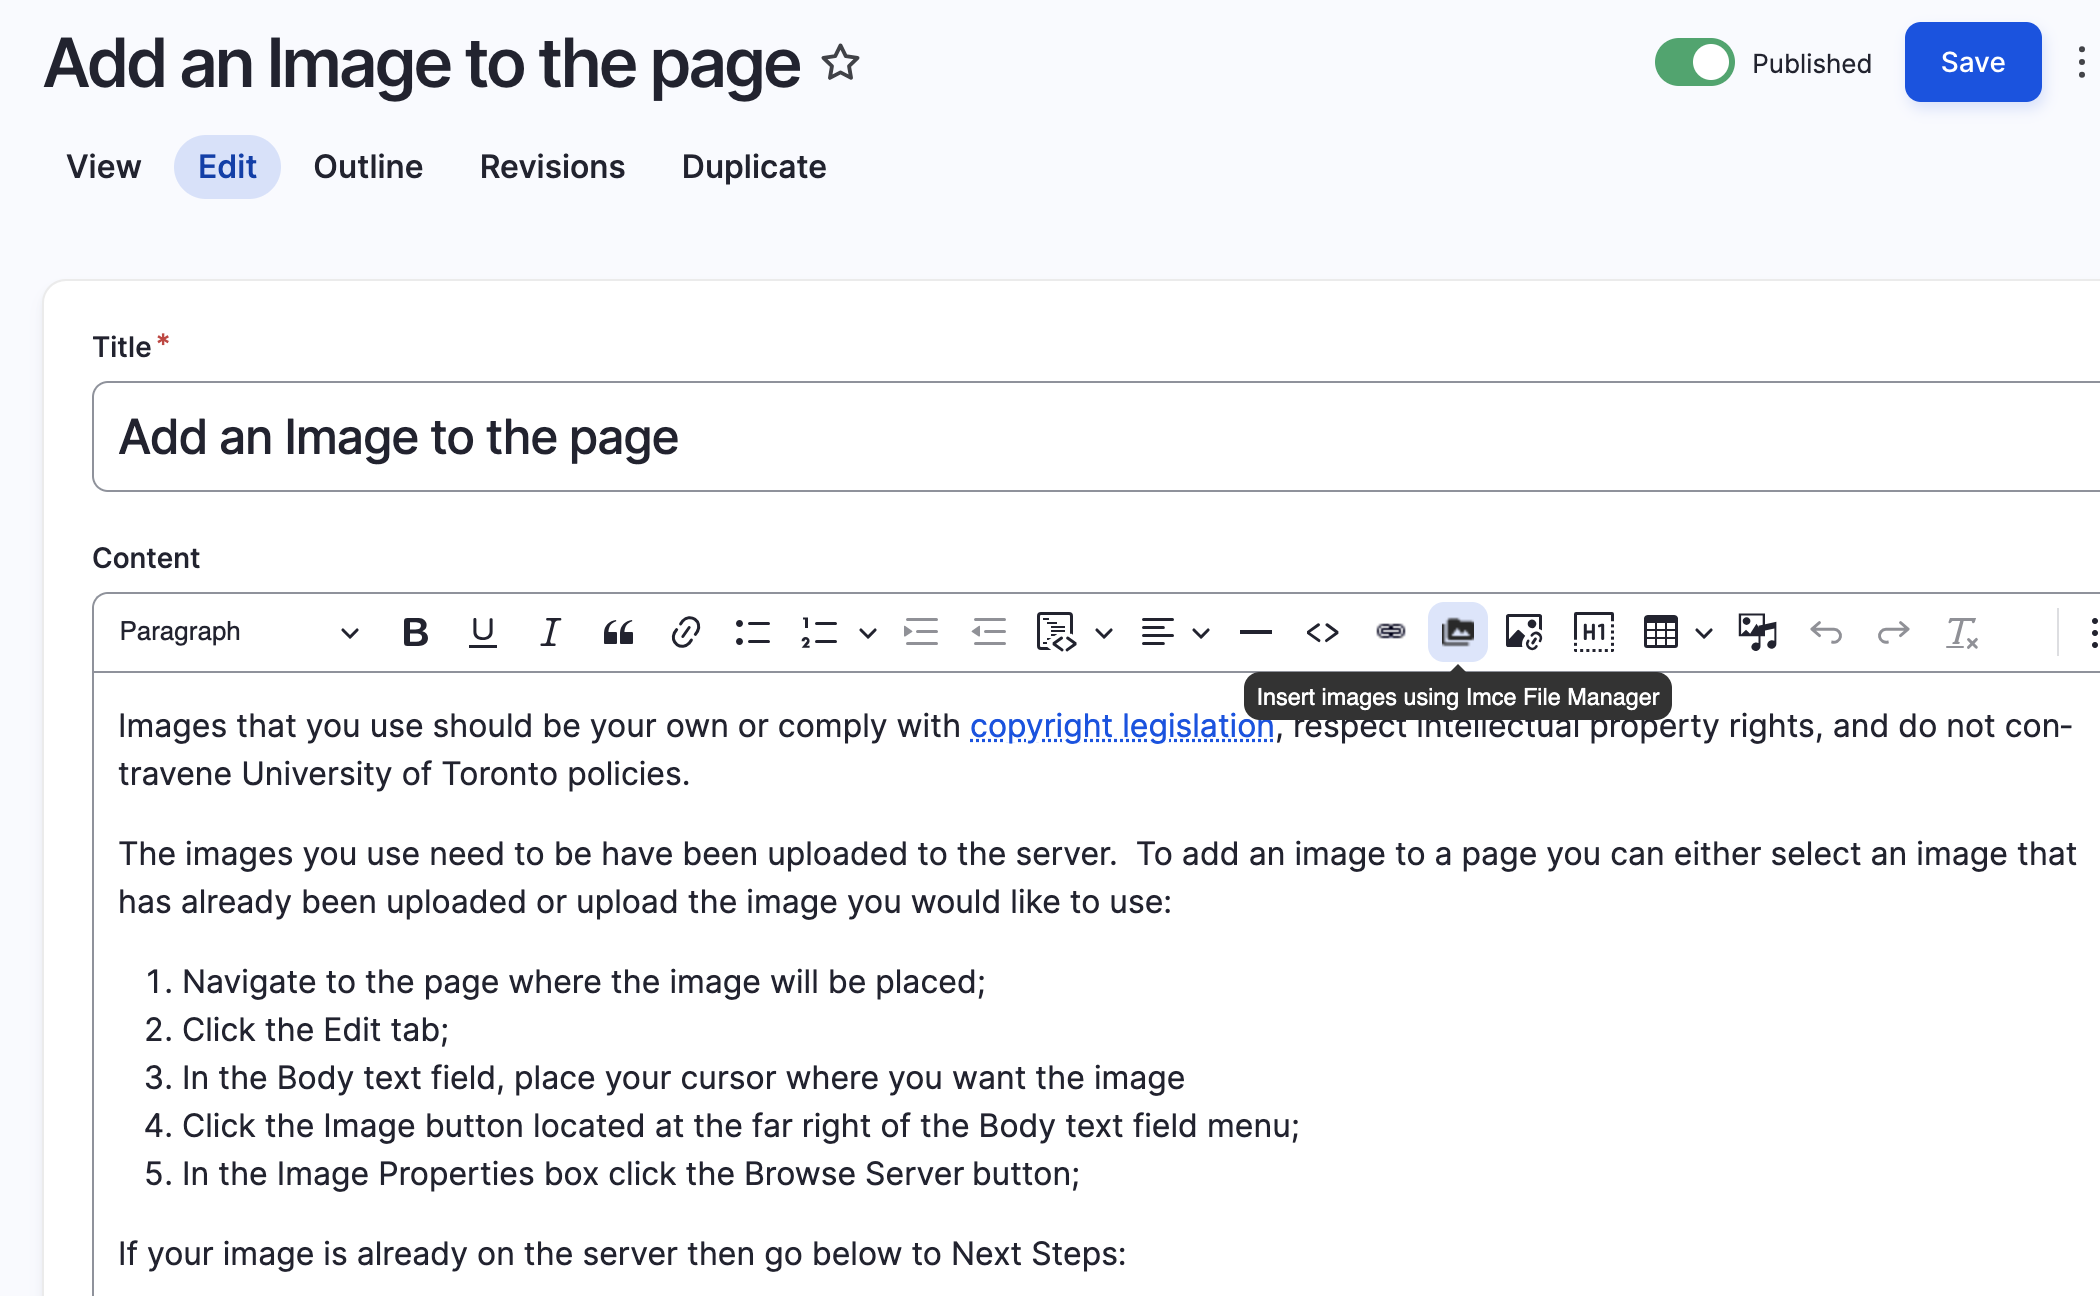
To add an image to a page, you can either:
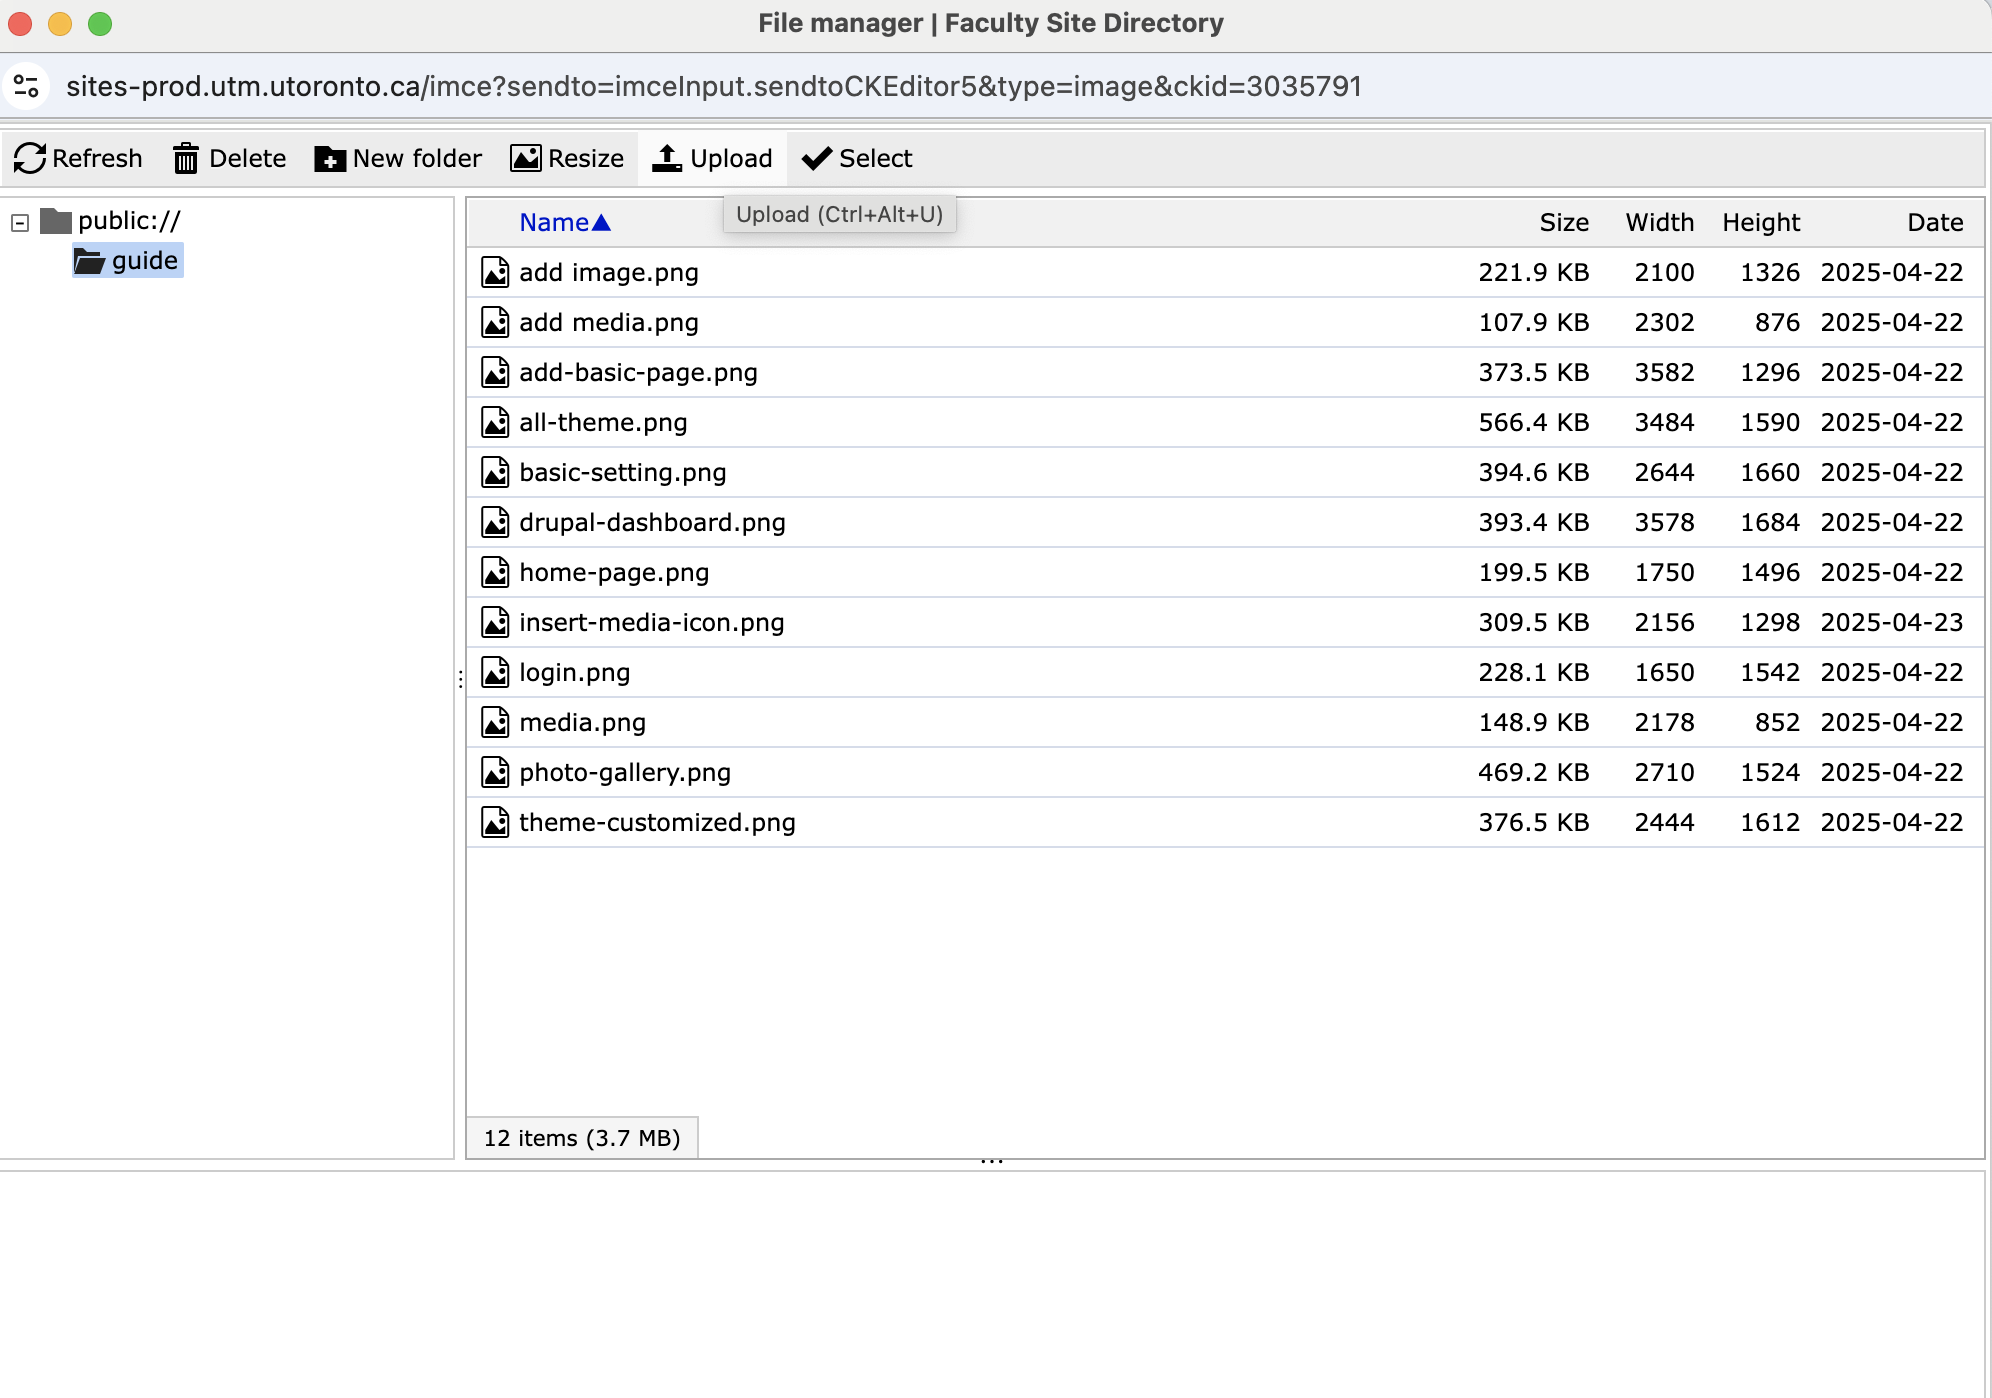
- Select an image that has already been uploaded
- Or upload a new image using the file manager
Upload a new image to your page:
- Navigate to the page where you want the image to appear.
- Click the Edit tab at the top of the page.
- In the Body text field, place your cursor where you want the image to be inserted.
- Click the
Insert Image using IMCE File Managericon in the editor’s toolbar. - In the file manager pop-up, click the
Uploadicon to upload an image from your device to the server. - After uploading, select the image you want to insert.
- Click Insert to place the image in the content area.
- Finally, click Save at the bottom of the page to publish your changes.
📸 Screenshots: